本文内容转自社区用户 System233 的项目 linglong-killer-self-service ,原文链接>>>
ll-killer-go – 玲珑杀手Go
前言
本项目是 Linglong Killer Self-Service (ll-killer 玲珑杀手) 的Go语言重构版本,将原本构建阶段的shell脚本重新用Go实现以更可靠地在 本地离线运行 ,并添加了许多增强功能。
项目主页:https://github.com/System233/ll-killer-go
ll-killer-go是什么
- ll-killer-go 是一个供本地运行的单文件命令行工具,它的前身是在线打包服务中的核心依赖,用于重新定义根文件系统。
- ll-killer-go 在本质上重新实现了“容器”,因此能够在玲珑容器中重新定义根文件系统而不受玲珑的限制。
- ll-killer-go 是一套玲珑应用构建解决方案,提供了打包中常见的功能需求,如apt/deb包安装、幽灵依赖/缺失库的查找与补全、图标/快捷方式路径修复、可重入的构建环境、自由的根文件系统。
本文主要包括 ll-killer-go的简单介绍和一个Ubuntu源的 GIMP应用的迁移示例教程。
项目简介
ll-killer-go 是一款专为解决玲珑容器应用构建问题而设计的命令行工具。它帮助开发者快速创建、构建和生成玲珑容器应用项目,同时提供一整套辅助构建与调试功能。使用该工具,用户可以在玲珑容器中获得与传统容器(如 docker)类似的构建体验,包括对特权命令的支持和 apt 安装等功能,免去了手动解压软件包(如 deb)和修复依赖库查找路径的繁琐操作。ll-killer-go 通过重建自由的容器环境,确保构建过程的一致性与可靠性,极大地提高了开发效率和可维护性。
特色功能
- 隔离的 APT 环境:可以创建项目独立的apt环境,与宿主机和其他项目互不干扰,方便查找包和依赖。
- 可重入的构建环境:避免每次进入构建环境都清空文件系统,可以反复进入构建环境调整,直到你满意为止。
- rootless 权限:可以在构建环境以虚拟的root身份执行特权命令(如
apt install),但无需担心安全问题。 - 自由的容器环境:在构建环境中,你可以自由修改任何位置,提供灵活的操作空间,方便调试和调整。
- 自动修复图标和快捷方式:
build-aux中提供的一系列修复脚本能够自动处理图标/快捷方式和 相对目录符号链接OpenAtom-Linyaps/linyaps#1039 问题。 - 自动修复幽灵依赖和缺失库:通过build-aux中提供
ldd-check/ldd-search检查工具,可以自动扫描缺失的运行时库文件,并查找所在的包名并安装,确保应用能够正常运行。 - 支持主机设备文件:默认挂载了主机的
/dev设备文件,可以直接在容器环境中访问设备(该行为作为自由的容器环境的一部分体现,可以在entrypoint.sh中取消)。
架构支持
- amd64/x86_64
- arm64/aarch64
- loong64
- 其他架构可自行编译,但没有
ptrace功能支持。
目录
- 命令概览
- 快速打包教程
- 1. 获取与配置
ll-killer- 全局安装
ll-killer(可选)
- 全局安装
- 2. 开始打包 GIMP 示例应用
- 创建工作目录
- 配置软件源
- 创建 linglong.yaml 项目文件
- 进入构建环境并使用APT安装软件包
- 检查并修复幽灵依赖
- 导出layer文件
- 测试构建结果
- 安装构建结果
- 命令汇总
- 1. 获取与配置
- 高级进阶内容
- 1. 定制根文件系统与挂载模式
- 2. 根文件系统挂载模式
fuse-overlayfs模式merge模式(默认回退)- 模式对比
- 3. 使用ll-killer辅助处理deb依赖但不安装
- 4. 使用ll-killer辅助处理幽灵依赖
- 结尾
命令概览
ll-killer-go 提供了一些核心命令来帮助构建和管理玲珑容器应用:
apt:进入隔离的 APT 环境。build:构建或进入构建环境。exec:进入运行时环境。run:启动容器,执行应用。commit:提交构建内容到玲珑容器。clean:清除构建内容。build-aux:创建辅助构建脚本。ptrace:修正系统调用(目前仅支持chown调用)。script:执行自定义构建流程。help:显示帮助信息。
提示: ll-killer的每个子命令都内置了详尽的帮助信息,推荐查看。
快速打包教程
本章节将展示如何使用 ll-killer快速打包 Ubuntu 源中 GIMP软件包,希望能够结合实际案例让大家更直观地了解 ll-killer打包过程。
整个过程无需配置库文件的环境变量,或对库文件进行修补,一切交给包管理器。[]~( ̄▽ ̄)~*
提示: 本教程默认使用merge模式进行根文件系统挂载,在文件冲突严重的情况下会显著增加启动时间,如需更佳的性能请在完成本教程后继续查看 高级进阶内容 章节。
1. 获取与配置 ll-killer
首先,确保系统已安装必要的依赖:
sudo apt install apt-file fuse-overlayfs然后,下载最新版本的 ll-killer 并赋予执行权限(当前最新为v1.1.1):
wget https://github.com/System233/ll-killer-go/releases/latest/download/ll-killer-amd64 -O ll-killer
chmod +x ll-killer
以上脚本下载的是 amd64架构,ll-killer-go还支持 arm64和 loong64架构,可以修改链接中的 amd64至其他版本,或进入项目Releases页手动下载。
如果上面的链接下不动,可以网上搜索github release 下载加速,然后把链接粘进去加速下载,再把文件放入相应位置。
⚠警告:从第三方地址加速下载时,注意文件的安全性。Releases页面提供了各个文件的sha1校验码,在文件下载完成后务必使用 sha1sum校验文件的完整性。
全局安装 ll-killer(可选)
为了方便使用,可将 ll-killer 安装到 ~/.local/bin:
mkdir -p ~/.local/bin
mv ll-killer ~/.local/bin
ll-killer -v
如果 ~/.local/bin 未添加至 PATH,或提示找不到ll-killer命令,请执行:
echo 'export PATH=$HOME/.local/bin:$PATH' >>~/.bashrc
source ~/.bashrc
2. 开始打包 GIMP 示例应用
接下来的步骤默认 ll-killer 已全局安装(加入 PATH环境变量)。
创建工作目录
此文件夹将作为玲珑工程文件夹。
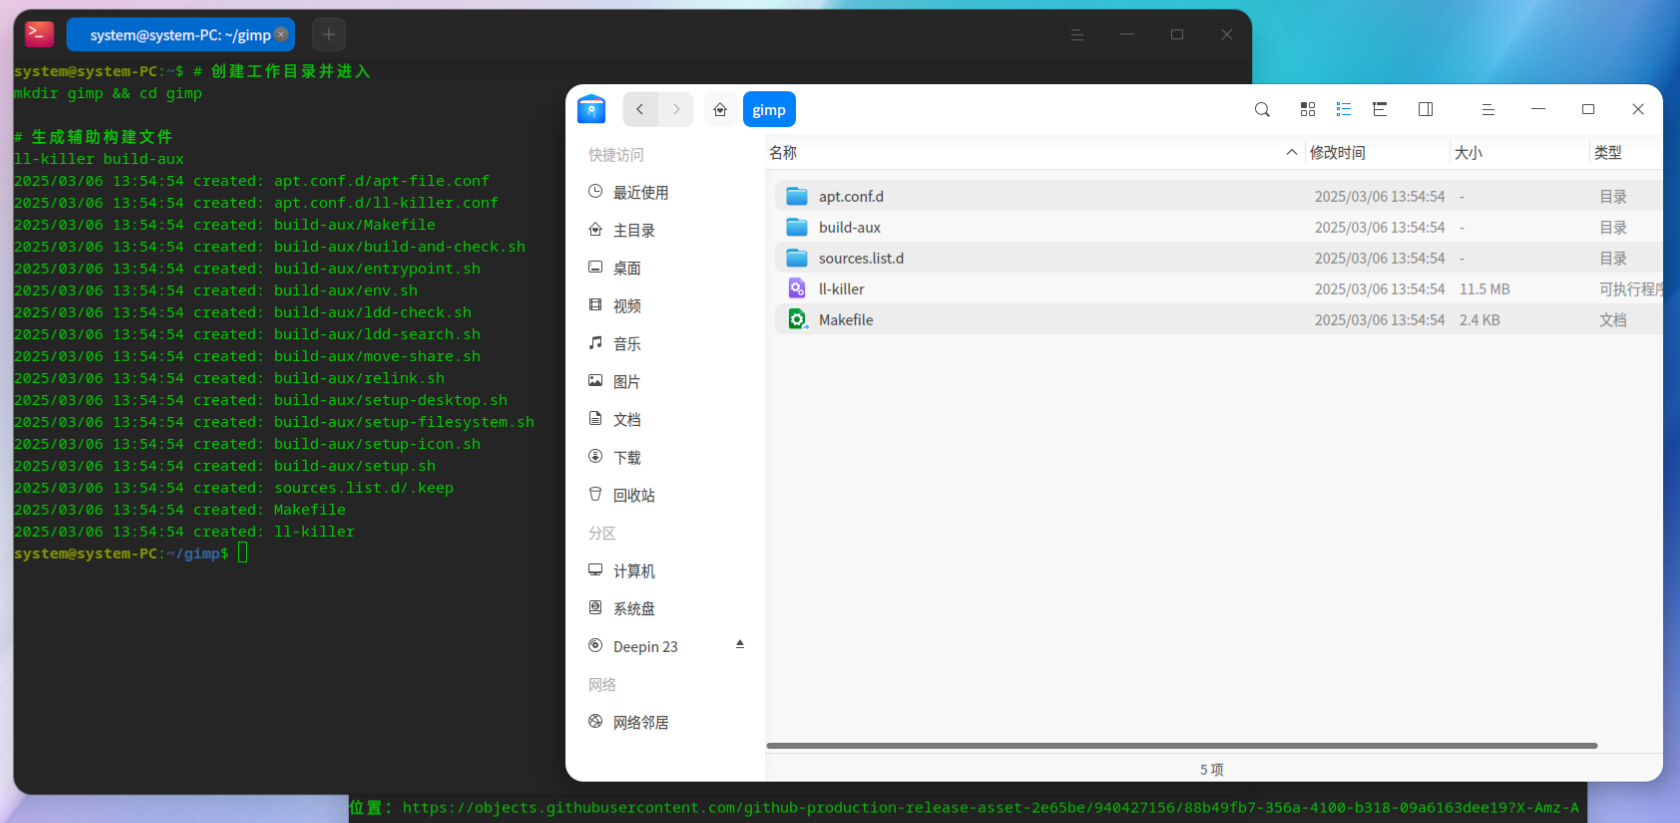
# 创建工作目录并进入
mkdir gimp && cd gimp

# 生成辅助构建文件
ll-killer build-aux
配置软件源
创建 sources.list 并填充 Ubuntu 24.04 noble 的软件源(也可以使用记事本创建此文件):
cat >sources.list <<EOF
deb [trusted=yes] https://mirrors.tuna.tsinghua.edu.cn/ubuntu/ noble main restricted universe multiverse
deb [trusted=yes] https://mirrors.tuna.tsinghua.edu.cn/ubuntu/ noble-updates main restricted universe multiverse
deb [trusted=yes] https://mirrors.tuna.tsinghua.edu.cn/ubuntu/ noble-backports main restricted universe multiverse
EOF

创建 linglong.yaml 项目文件
此步骤将 gimp包的元数据输出到 pkg.info,再由 ll-killer通过元数据创建项目,并指定包名为 gimp.linyaps。
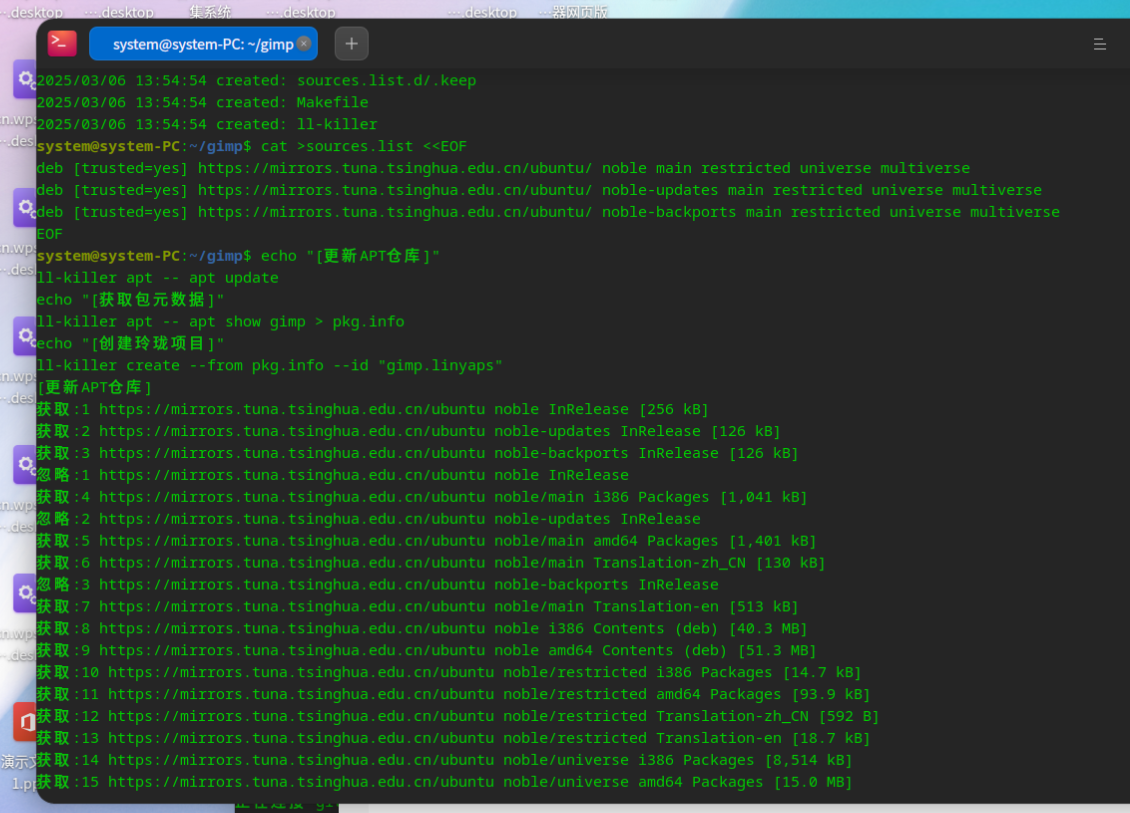
echo "[更新APT仓库]"
ll-killer apt -- apt update
echo "[获取包元数据]"
ll-killer apt -- apt show gimp > pkg.info
echo "[创建玲珑项目]"
ll-killer create --from pkg.info --id "gimp.linyaps"
- 运行输出
system@system-PC:~/gimp$ echo "[更新APT仓库]"
ll-killer apt -- apt update
echo "[获取包元数据]"
ll-killer apt -- apt show gimp > pkg.info
echo "[创建玲珑项目]"
ll-killer create --from pkg.info --id "gimp.linyaps"
[更新APT仓库]
获取:1 https://mirrors.tuna.tsinghua.edu.cn/ubuntu noble InRelease [256 kB]
获取:2 https://mirrors.tuna.tsinghua.edu.cn/ubuntu noble-updates InRelease [126 kB]
获取:3 https://mirrors.tuna.tsinghua.edu.cn/ubuntu noble-backports InRelease [126 kB]
忽略:1 https://mirrors.tuna.tsinghua.edu.cn/ubuntu noble InRelease
获取:4 https://mirrors.tuna.tsinghua.edu.cn/ubuntu noble/main i386 Packages [1,041 kB]
忽略:2 https://mirrors.tuna.tsinghua.edu.cn/ubuntu noble-updates InRelease
获取:5 https://mirrors.tuna.tsinghua.edu.cn/ubuntu noble/main amd64 Packages [1,401 kB]
获取:6 https://mirrors.tuna.tsinghua.edu.cn/ubuntu noble/main Translation-zh_CN [130 kB]
忽略:3 https://mirrors.tuna.tsinghua.edu.cn/ubuntu noble-backports InRelease
获取:7 https://mirrors.tuna.tsinghua.edu.cn/ubuntu noble/main Translation-en [513 kB]
获取:8 https://mirrors.tuna.tsinghua.edu.cn/ubuntu noble i386 Contents (deb) [40.3 MB]
获取:9 https://mirrors.tuna.tsinghua.edu.cn/ubuntu noble amd64 Contents (deb) [51.3 MB]
获取:10 https://mirrors.tuna.tsinghua.edu.cn/ubuntu noble/restricted i386 Packages [14.7 kB]
获取:11 https://mirrors.tuna.tsinghua.edu.cn/ubuntu noble/restricted amd64 Packages [93.9 kB]
获取:12 https://mirrors.tuna.tsinghua.edu.cn/ubuntu noble/restricted Translation-zh_CN [592 B]
获取:13 https://mirrors.tuna.tsinghua.edu.cn/ubuntu noble/restricted Translation-en [18.7 kB]
获取:14 https://mirrors.tuna.tsinghua.edu.cn/ubuntu noble/universe i386 Packages [8,514 kB]
获取:15 https://mirrors.tuna.tsinghua.edu.cn/ubuntu noble/universe amd64 Packages [15.0 MB]
获取:16 https://mirrors.tuna.tsinghua.edu.cn/ubuntu noble/universe Translation-en [5,982 kB]
获取:17 https://mirrors.tuna.tsinghua.edu.cn/ubuntu noble/universe Translation-zh_CN [574 kB]
获取:18 https://mirrors.tuna.tsinghua.edu.cn/ubuntu noble/multiverse i386 Packages [126 kB]
获取:19 https://mirrors.tuna.tsinghua.edu.cn/ubuntu noble/multiverse amd64 Packages [269 kB]
获取:20 https://mirrors.tuna.tsinghua.edu.cn/ubuntu noble/multiverse Translation-zh_CN [4,640 B]
获取:21 https://mirrors.tuna.tsinghua.edu.cn/ubuntu noble/multiverse Translation-en [118 kB]
获取:22 https://mirrors.tuna.tsinghua.edu.cn/ubuntu noble-updates/main amd64 Packages [914 kB]
获取:23 https://mirrors.tuna.tsinghua.edu.cn/ubuntu noble-updates/main i386 Packages [435 kB]
获取:24 https://mirrors.tuna.tsinghua.edu.cn/ubuntu noble-updates/main Translation-en [206 kB]
获取:25 https://mirrors.tuna.tsinghua.edu.cn/ubuntu noble-updates i386 Contents (deb) [22.6 MB]
获取:26 https://mirrors.tuna.tsinghua.edu.cn/ubuntu noble-updates amd64 Contents (deb) [46.4 MB]
获取:27 https://mirrors.tuna.tsinghua.edu.cn/ubuntu noble-updates/restricted amd64 Packages [724 kB]
获取:28 https://mirrors.tuna.tsinghua.edu.cn/ubuntu noble-updates/restricted i386 Packages [14.3 kB]
获取:29 https://mirrors.tuna.tsinghua.edu.cn/ubuntu noble-updates/restricted Translation-en [144 kB]
获取:30 https://mirrors.tuna.tsinghua.edu.cn/ubuntu noble-updates/universe i386 Packages [627 kB]
获取:31 https://mirrors.tuna.tsinghua.edu.cn/ubuntu noble-updates/universe amd64 Packages [1,036 kB]
获取:32 https://mirrors.tuna.tsinghua.edu.cn/ubuntu noble-updates/universe Translation-en [259 kB]
获取:33 https://mirrors.tuna.tsinghua.edu.cn/ubuntu noble-updates/multiverse i386 Packages [3,484 B]
获取:34 https://mirrors.tuna.tsinghua.edu.cn/ubuntu noble-updates/multiverse amd64 Packages [23.4 kB]
获取:35 https://mirrors.tuna.tsinghua.edu.cn/ubuntu noble-updates/multiverse Translation-en [5,308 B]
获取:36 https://mirrors.tuna.tsinghua.edu.cn/ubuntu noble-backports i386 Contents (deb) [19.9 kB]
获取:37 https://mirrors.tuna.tsinghua.edu.cn/ubuntu noble-backports amd64 Contents (deb) [35.9 kB]
获取:38 https://mirrors.tuna.tsinghua.edu.cn/ubuntu noble-backports/universe i386 Packages [8,976 B]
获取:39 https://mirrors.tuna.tsinghua.edu.cn/ubuntu noble-backports/universe amd64 Packages [14.2 kB]
获取:40 https://mirrors.tuna.tsinghua.edu.cn/ubuntu noble-backports/universe Translation-en [12.1 kB]
已下载 199 MB,耗时 25秒 (7,961 kB/s)
正在读取软件包列表... 完成
正在分析软件包的依赖关系树... 完成
有 1646 个软件包可以升级。请执行 ‘apt list --upgradable’ 来查看它们。
W: GPG 错误:https://mirrors.tuna.tsinghua.edu.cn/ubuntu noble InRelease: 由于没有公钥,无法验证下列签名: NO_PUBKEY 871920D1991BC93C
W: GPG 错误:https://mirrors.tuna.tsinghua.edu.cn/ubuntu noble-updates InRelease: 由于没有公钥,无法验证下列签名: NO_PUBKEY 871920D1991BC93C
W: GPG 错误:https://mirrors.tuna.tsinghua.edu.cn/ubuntu noble-backports InRelease: 由于没有公钥,无法验证下列签名: NO_PUBKEY 871920D1991BC93C
[获取包元数据]

WARNING: apt does not have a stable CLI interface. Use with caution in scripts.

[创建玲珑项目]
2025/03/06 13:57:16 skip: apt.conf.d/apt-file.conf
2025/03/06 13:57:16 skip: apt.conf.d/ll-killer.conf
2025/03/06 13:57:16 skip: build-aux/Makefile
2025/03/06 13:57:16 skip: build-aux/build-and-check.sh
2025/03/06 13:57:16 skip: build-aux/entrypoint.sh
2025/03/06 13:57:16 skip: build-aux/env.sh
2025/03/06 13:57:16 skip: build-aux/ldd-check.sh
2025/03/06 13:57:16 skip: build-aux/ldd-search.sh
2025/03/06 13:57:16 skip: build-aux/move-share.sh
2025/03/06 13:57:16 skip: build-aux/relink.sh
2025/03/06 13:57:16 skip: build-aux/setup-desktop.sh
2025/03/06 13:57:16 skip: build-aux/setup-filesystem.sh
2025/03/06 13:57:16 skip: build-aux/setup-icon.sh
2025/03/06 13:57:16 skip: build-aux/setup.sh
2025/03/06 13:57:16 skip: sources.list.d/.keep
2025/03/06 13:57:16 skip: Makefile
2025/03/06 13:57:16 skip: ll-killer
2025/03/06 13:57:16 skip:  sources.list
2025/03/06 13:57:16 created: linglong.yaml
[Build Target]
  gimp.linyaps
[Project Info]
  Package Name: gimp
  Version: 2.10.3812.0
  Package Type: app
  Build Arch: x86_64
[Current Repo]
  Name: stable
  Url: https://mirror-repo-linglong.deepin.com
[Processing Dependency]
  Package                  Version        Module         Status
  org.deepin.base          23.1.0.3       binary         complete
  org.deepin.base          23.1.0.3       develop        complete
[Start Build]
[Install Files]
  Package          Version        Module         Status
  gimp.linyaps     2.10.3812.0    develop        complete
  gimp.linyaps     2.10.3812.0    binary         complete

[Commit Contents]
  Package          Version        Module         Status
  gimp.linyaps     2.10.3812.0    binary         complete
  gimp.linyaps     2.10.3812.0    develop        complete
Successfully build gimp.linyaps
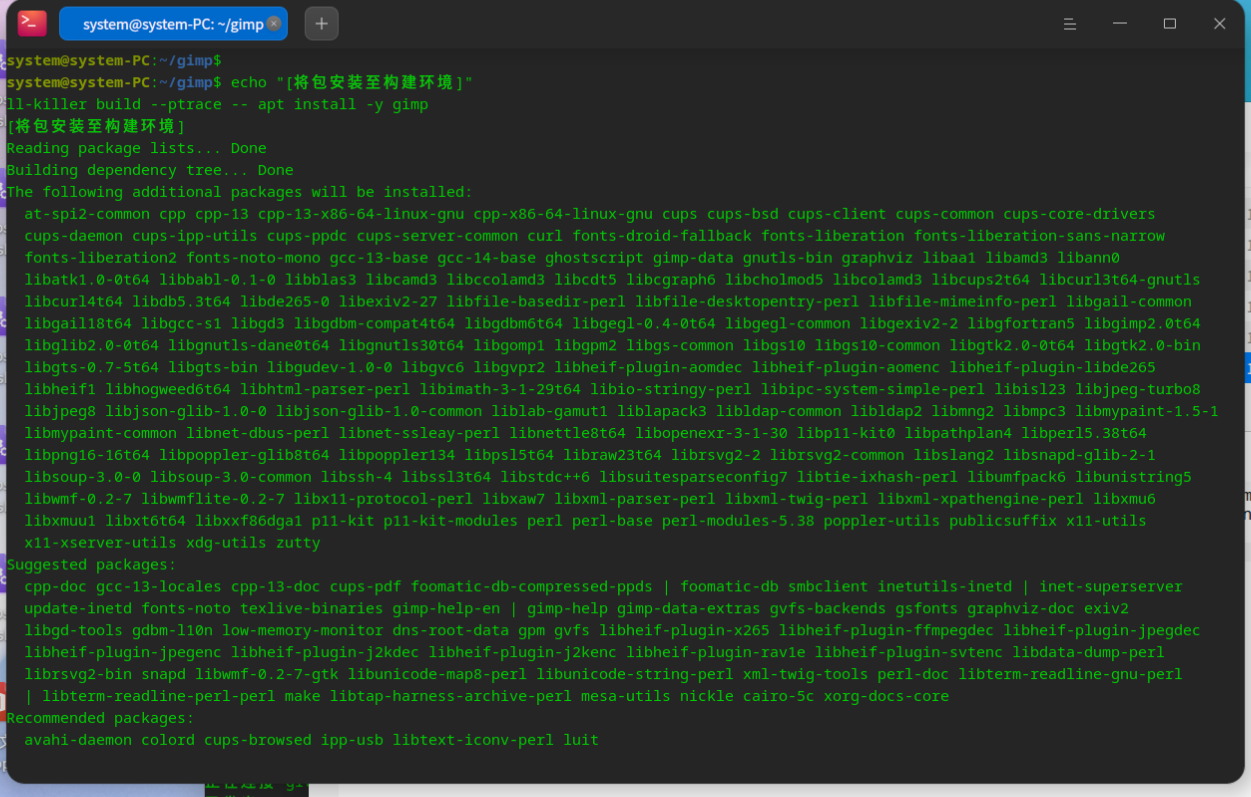
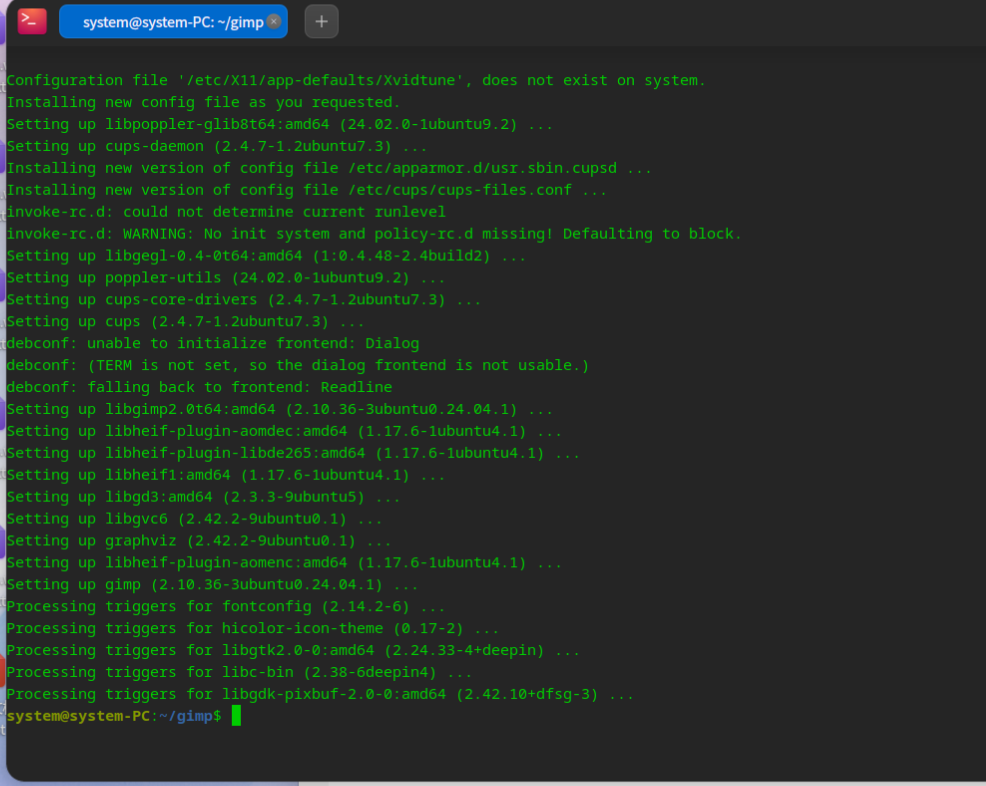
进入构建环境并使用APT安装软件包
使用 ll-killer build命令进入Rootless构建环境(虚拟root身份),其中 --ptrace参数可以解决Rootless安装deb包时出现的文件所有权问题。
echo "[将包安装至构建环境]"
ll-killer build --ptrace -- apt install -y gimp
重要提示:
- 直接使用
ll-killer build --ptrace -- bash可以进入交互式shell环境。 - 可以通过
ll-killer build命令反复进入构建环境,不会像ll-builder build那样每次运行都重置环境。 ll-killer build命令默认启用--strict严格模式,确保构建环境与运行时环境完全一致,不会出现ll-builder build中引入构建依赖的问题。构建依赖属于幽灵依赖,会在运行时消失,因此有必要消除隐患。
检查并修复幽灵依赖
此脚本执行以下步骤:
- 此脚本调用build-aux中的
ldd-check.sh工具来检查环境中的缺失依赖,缺失文件名输出到ldd-check.log。 - 调用
ldd-search.sh工具查找ldd-check.log中列出的文件,并将找到的包写入ldd-found.log,仍然找不到的文件输出至ldd-notfound.log。 - 安装找到的库。
echo "[检查缺失库]"
ll-killer build -- build-aux/ldd-check.sh > ldd-check.log
echo "[搜索缺失库所在包]"
ll-killer apt -- build-aux/ldd-search.sh ldd-check.log ldd-found.log ldd-notfound.log;
echo "[安装找到的缺失库]"
ll-killer build --ptrace -- apt install -y $(cat ldd-found.log)
- 运行输出。由于这里没有缺失库,因此没有新安装任何包。
system@system-PC:~/gimp$ echo "[检查缺失库]"
ll-killer build -- build-aux/ldd-check.sh > ldd-check.log
echo "[搜索缺失库所在包]"
ll-killer apt -- build-aux/ldd-search.sh ldd-check.log ldd-found.log ldd-notfound.log;
echo "[安装找到的缺失库]"
ll-killer build --ptrace -- apt install -y $(cat ldd-found.log)
[检查缺失库]
[搜索缺失库所在包]
[安装找到的缺失库]
Reading package lists... Done
Building dependency tree... Done
Reading state information... Done
0 upgraded, 0 newly installed, 0 to remove and 419 not upgraded.
system@system-PC:~/gimp$ cat ldd-found.log
导出layer文件
将文件导入 ll-builder的构建容器,同时使用 --skip-output-check跳过 ll-builder自带的ldd检查,使用 --skip-strip-symbols跳过二进制的 strip,最后导出layer文件。
- ll-killer文件系统独立于ll-builder,因此若需要导出layer文件,还需将文件导入容器环境(ostree),再由ll-builder导出layer文件。理论上ll-builder无需导入ostree即可生成layer,还可以避免因复制逻辑的错误而引起OpenAtom-Linyaps/linyaps#1039 。
echo "[提交文件到容器中]"
ll-killer commit -- --skip-output-check --skip-strip-symbols
echo "[导出layer文件]"
ll-killer export -- --layer
- 运行输出
system@system-PC:~/gimp$ echo "[提交文件到容器中]"
ll-killer commit -- --skip-output-check --skip-strip-symbols
echo "[导出layer文件]"
ll-killer export -- --layer
[提交文件到容器中]
[Build Target]
  gimp.linyaps
[Project Info]
  Package Name: gimp
  Version: 2.10.3812.0
  Package Type: app
  Build Arch: x86_64
[Current Repo]
  Name: stable
  Url: https://mirror-repo-linglong.deepin.com
[Processing Dependency]
  Package                  Version        Module         Status
  org.deepin.base          23.1.0.3       binary         complete
  org.deepin.base          23.1.0.3       develop        complete
[Start Build]
[准备文件系统]
mkdir: 无法创建目录 "/opt/apps/gimp.linyaps/files/share": 文件已存在
[复制必要文件]
'/home/system/.local/bin/ll-killer' -> '/opt/apps/gimp.linyaps/files/ll-killer'
'build-aux/entrypoint.sh' -> '/opt/apps/gimp.linyaps/files/entrypoint.sh'
[调整文件布局]
mv: 对 '/opt/apps/gimp.linyaps/files/usr/share' 调用 stat 失败: 没有那个文件或目录
[合并share目录]
find: ‘/opt/apps/gimp.linyaps/files/opt/apps/’: 没有那个文件或目录
[修正符号链接]
[配置快捷方式]
/opt/apps/gimp.linyaps/files/share/applications/gimp.desktop
/opt/apps/gimp.linyaps/files/share/applications/zutty.desktop
[Install Files]
  Package          Version        Module         Status
  gimp.linyaps     2.10.3812.0    develop        complete
  gimp.linyaps     2.10.3812.0    binary         complete

[Commit Contents]
  Package          Version        Module         Status
  gimp.linyaps     2.10.3812.0    binary         complete
  gimp.linyaps     2.10.3812.0    develop        complete
Successfully build gimp.linyaps
[导出layer文件]
system@system-PC:~/gimp$
此步骤完成后,最终会生成两个 .layer文件,仅需保留 *_binary.layer。
提示
ll-killer commit命令是ll-builder build的别名。ll-killer export命令是ll-builder export的别名。--双横线后传递ll-builder的参数。
测试构建结果
此命令进入容器环境的shell,请结合desktop中的Exec指令来测试程序。
# 等价于ll-builder run
ll-killer run
如需进入原始玲珑容器环境,请运行:
# 等价于ll-builder run --exec bash
ll-killer run -- --exec bash
- 运行结果
system@system-PC:~/gimp$
dircolors: no SHELL environment variable, and no shell type option given
system@system-PC:/run/host/rootfs/home/system/gimp$ /opt/apps/gimp.linyaps/files/
entrypoint.sh  etc/           ll-killer      share/         usr/           var/
system@system-PC:/run/host/rootfs/home/system/gimp$ /opt/apps/gimp.linyaps/files/^C
system@system-PC:/run/host/rootfs/home/system/gimp$ ls /
bin   dev            etc   lib    ll-killer  mnt  packages.list  root  runtime  share  sys  usr
boot  entrypoint.sh  home  lib64  media      opt  proc           run   sbin     srv    tmp  var
system@system-PC:/run/host/rootfs/home/system/gimp$ /bin/gi
giftopnm                 gimp-2.10                gimp-console-2.10        gio
gimp                     gimp-console             gimp-test-clipboard-2.0  gio-querymodules
system@system-PC:/run/host/rootfs/home/system/gimp$ /bin/gimp
可以看到根目录下有 ll-killer和 entrypoint.sh文件,同时bin目录下出现了gimp文件,我们运行gimp命令:
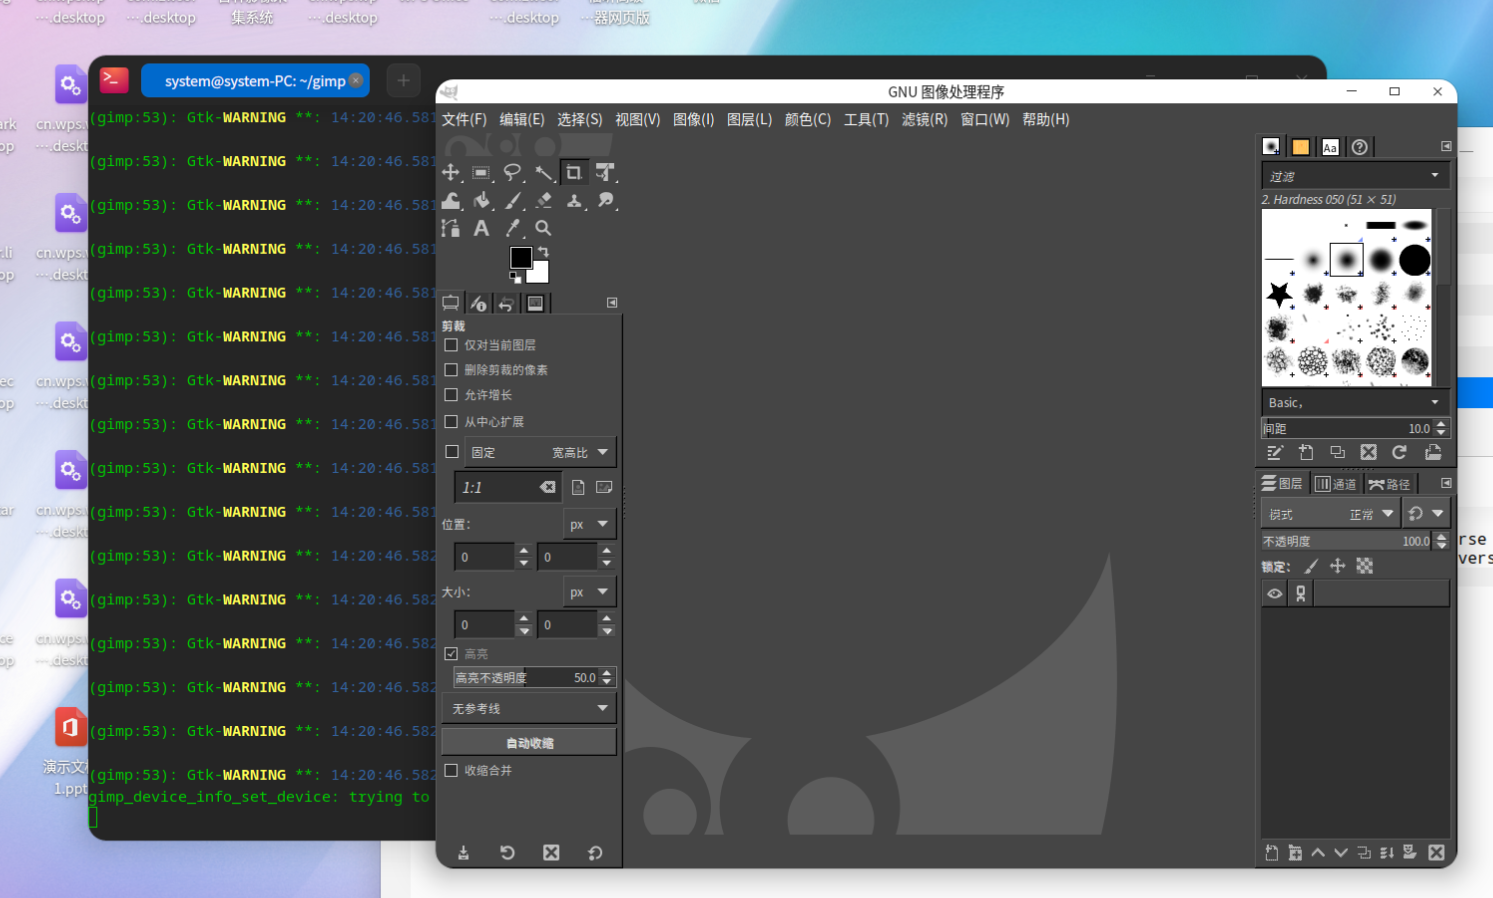
可见正常运行,轻松秒杀。
提示
- ll-killer创建的应用默认执行
/opt/apps/APPID/files/entrypoint.sh入口点,因此ll-killer run/ll-builder run/ll-cli run不会启动具体的应用,具体的应用启动由desktop中的Exec指令指定。 ll-killer run命令是ll-builder run的别名。--双横线后传递ll-builder的参数。
安装构建结果
# 玲珑 >= 1.7.x 版本需要 sudo 权限
ll-cli install *_binary.layer
- 运行结果
system@system-PC:~/gimp$ sudo ll-cli install ./gimp.linyaps_2.10.3812.0_x86_64_binary.layer
请输入密码:
验证成功
(3531114) ./libs/linglong/src/linglong/cli/cli.cpp:764 install from file "/home/system/gimp/gimp.linyaps_2.10.3812.0_x86_64_binary.layer"
install layer successfully:100%
system@system-PC:~/gimp$
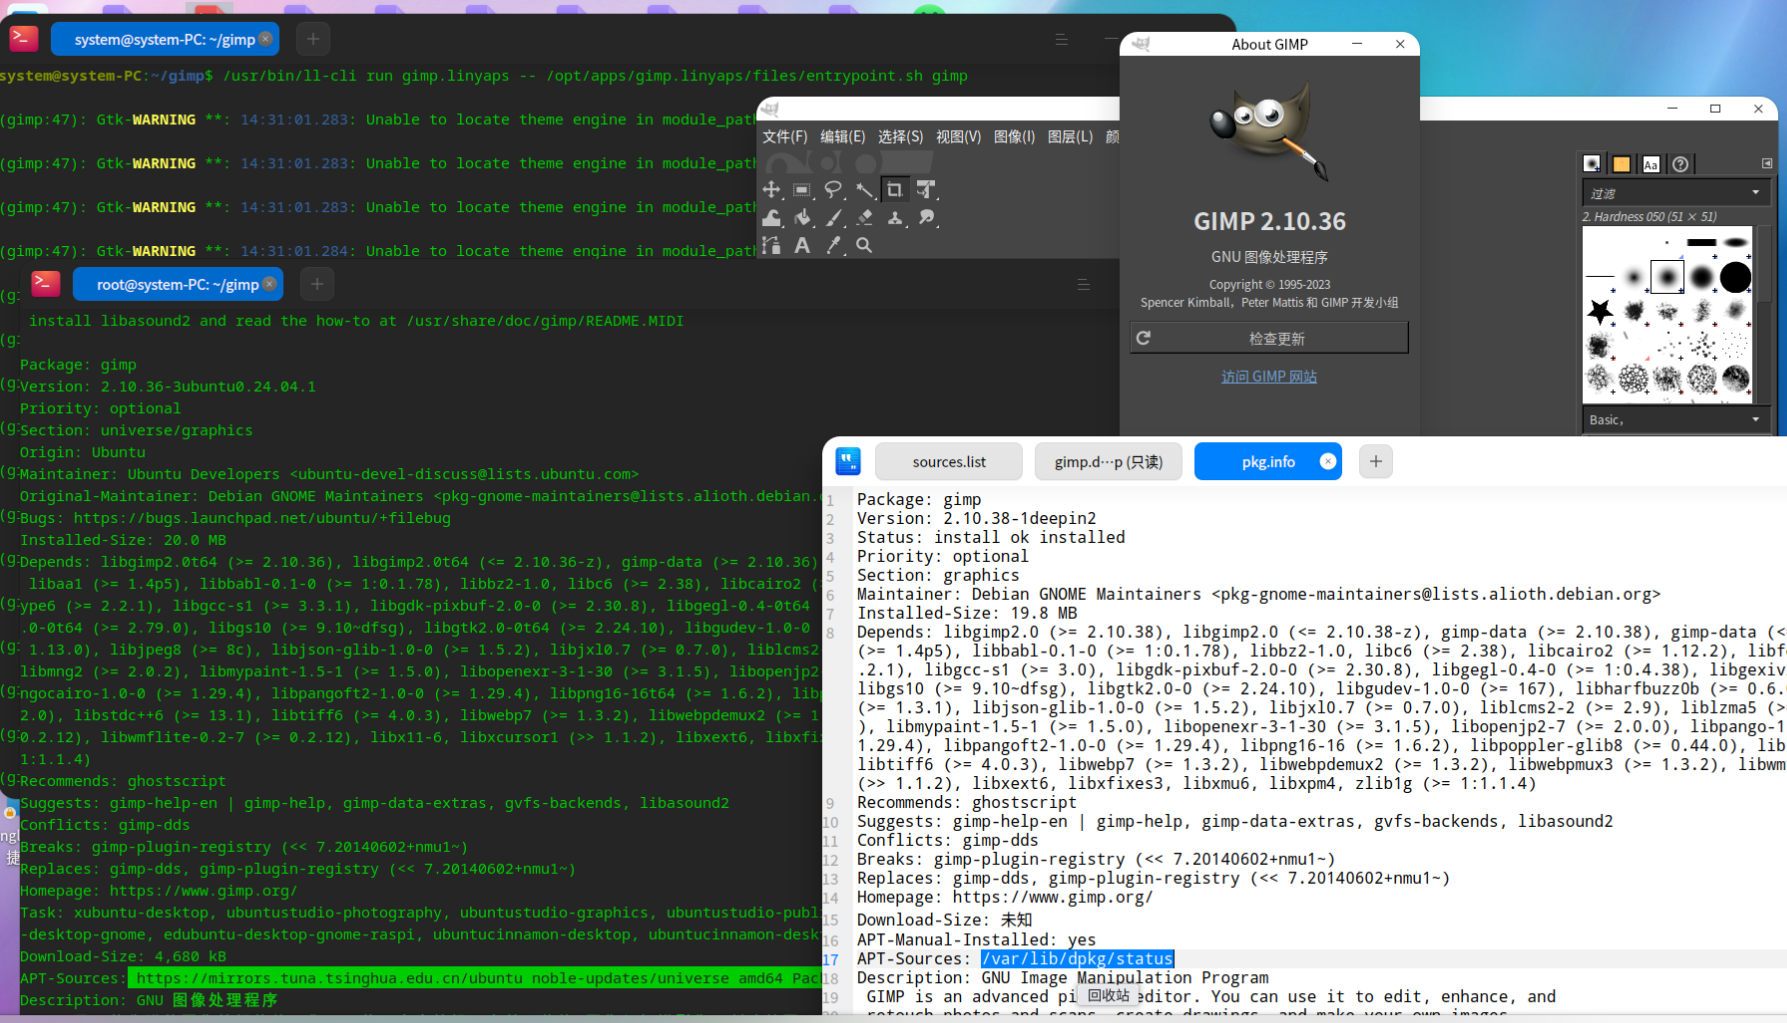
程序正常运行,但关于页面显示是2.10.36,不是检测到的2.10.38。这是由于我主机上也安装了gimp,deepin源中的GIMP版本为2.10.38,在创建项目时生成了本地安装的 2.10.38版本的 pkg.info。但我们打包的是Ubuntu源中的GIMP,指定的是Ubuntu的源,里面的版本只更新到 2.10.36,因此实际打包了 2.10.36版本。此问题仅在主机上也安装了该应用时出现。
- 小提示:如果你在非严格模式下打包GIMP,部分依赖会因为
ll-builder build环境已安装而跳过安装(如librsvg2-2),从而引起运行时的幽灵依赖,造成GIMP图标主题不能正常显示。 - Bug:这里还有遇到一个linux桌面环境或DDE的设计缺陷,若XDG_DATA目录下有多个重名的desktop,只会显示其中一个desktop快捷方式,即便你将其他软件的desktop改名为同名deskop,双击也不会启动你点击的desktop,而是启动了同名的那个快捷方式。我这里因为主机安装了GIMP,因此再安装玲珑的GIMP时,不会显示玲珑的GIMP快捷方式,看起来就好像没安装成功一样。
[BUG] 桌面同名desktop文件与/var/lib/linglong/entries/share/applications的desktop冲突 · Issue #704 · OpenAtom-Linyaps/linyaps
命令汇总
以下脚本包含了本章节中的所有命令。
echo "[更新APT仓库]"
ll-killer apt -- apt update
echo "[获取包元数据]"
ll-killer apt -- apt show gimp > pkg.info
echo "[创建玲珑项目]"
ll-killer create --from pkg.info --id "gimp.linyaps"
echo "[将包安装至构建环境]"
ll-killer build --ptrace -- apt install -y gimp

## 可选 ldd检查开始
echo "[检查缺失库]"
ll-killer build -- build-aux/ldd-check.sh > ldd-check.log
echo "[搜索缺失库所在包]"
ll-killer apt -- build-aux/ldd-search.sh ldd-check.log ldd-found.log ldd-notfound.log;
echo "[安装找到的缺失库]"
ll-killer build -- apt install -y $(cat ldd-found.log)
## 可选 ldd检查结束

echo "[提交文件到容器中]"
ll-killer commit -- --skip-output-check --skip-strip-symbols
echo "[导出layer文件]"
ll-killer export -- --layer


# 玲珑 >= 1.7.x 版本需要 sudo 权限
echo "[安装layer文件]"
ll-cli install *_binary.layer
- 提示:以上命令都已经封装进了
Makefile中,如果你希望使用make来管理构建流程,可以使用以下命令代替上面的全部:
# 先手动创建sources.list
# ...

# 创建 config.mk 配置文件
make config PKG="gimp" KILLER_CREATE_ARGS="--base org.deepin.base/23.1.0"
# 自动完成项目创建,安装,ldd检查和导出layer文件
make
高级进阶内容
1. 定制根文件系统与挂载模式
你可以在 build-aux/entrypoint.sh中观察到如下代码,这些代码展示了 ll-killer的默认根文件系统是如何构建的。
exec $APP_DIR/ll-killer exec \
    --mount "$APP_DIR/share:$APP_DIR/usr/share:rbind" \
    --mount "rootfs:/run/app.rootfs::tmpfs" \
    --mount "/+$APP_DIR:/run/app.rootfs::merge" \
    --mount "/run/host/rootfs/dev:/run/app.rootfs/dev:rbind" \
    --mount "/dev/pts:/run/app.rootfs/dev/pts:rbind" \
    --mount "/dev/shm:/run/app.rootfs/dev/shm:rbind" \
    --mount "/dev/mqueue:/run/app.rootfs/dev/mqueue:rbind" \
    --mount "/proc:/run/app.rootfs/proc:rbind" \
    --mount "/run:/run/app.rootfs/run:rbind" \
    --mount "/sys:/run/app.rootfs/sys:rbind" \
    --mount "/tmp:/run/app.rootfs/tmp:rbind" \
    --mount "/home:/run/app.rootfs/home:rbind" \
    --mount "/root:/run/app.rootfs/root:rbind" \
    --socket=/run/app.unix \
    --rootfs=/run/app.rootfs \
    --no-bind-rootfs \
    -- "$KILLER_ENTRYPOINT" "${@:-bash}"
--mount选项支持常见的挂载标志和文件系统类型,比如 tmpfs/devpts/overlay等,并额外支持 fuse-overlayfs和 merge挂载模式。
你可以在 System233/ll-killer-go#挂载相关功能 中找到详细的说明。
提示: ll-killer exec本身作为一个简化版的容器,支持在没有玲珑的情况下独立运行,并创建独立的文件系统,它只是不使用基于文件的 OCI配置以增强命令行的调用能力。
2. 根文件系统挂载模式
ll-killer 运行时默认使用 fuse-overlayfs 和 merge 两种挂载模式进行根文件系统的挂载。
在未经额外配置的情况下,仅使用**merge**模式。
具体的挂载规则请查看build-aux/entrypoint.sh入口点文件。
fuse-overlayfs 模式
- 需确保
fuse-overlayfs为 静态编译 或能直接在容器中运行。 - 需要将
fuse-overlayfs二进制文件复制到build-aux目录以启用。 - 启动速度快,但要求宿主机支持
fuse内核模块。
merge 模式(默认模式)
- 若
fuse-overlayfs不可用或运行失败,则自动回退至merge模式。 - 需要计算合并目录,目录冲突越多,合并时间越长。
- 兼容性好,默认作为兜底方案。
模式对比
| 模式 | 启动速度 | 依赖 fuse | 兼容性 |
|---|---|---|---|
fuse-overlayfs | 快 | 是 | 低 |
merge | 慢 | 否 | 高 |
3. 使用ll-killer辅助处理deb依赖但不安装
本案例的目的是方便传统手工打包者搜索和处理依赖,利用apt缓存功能自动下载某个包在base环境下所依赖的包。
由于操作在容器环境中进行,因此在多个打包操作同时进行的情况下,不会出现 ll-pica中的冲突情况。此外,由于使用的是base中的原生apt功能,搜索结果比 ll-pica的 aptly模糊匹配更加可靠,下载速度也更快。
# 创建一个全新的玲珑项目
ll-killer create
# 在容器中利用安装功能下载全部依赖包
ll-killer build -- apt install <你所需的包...>
# 在linglong/apt/cache/apt/archives中获取依赖包,复制到你想要的任何位置
cp -arfT linglong/apt/cache/apt/archives .
- 过程中无需关心
apt install的安装结果,只要它下载完成就行。
4. 使用ll-killer辅助处理幽灵依赖
本案例展示如何单独使用 ll-killer的幽灵依赖检查功能,来帮助手工打包者查找deb包中未声明的依赖包名。
前提条件
- 宿主机已安装
apt-file软件包。 sources.list中指定的仓库具有Contents索引。
# 创建ll-killer辅助工具
ll-killer build-aux
# 调用ldd-check.sh工具检查缺失库
ll-builder run --exec build-aux/ldd-check.sh > ldd-check.log
echo "缺失以下文件"
cat ldd-check.log

# 调用ldd-search.sh工具检查缺失库所在的包名
ll-killer apt -- build-aux/ldd-search.sh ldd-check.log ldd-found.log  ldd-notfound.log
echo "找到以下包"
cat ldd-found.log

echo "未能确定以下文件的所在包"
cat ldd-notfound.log
结尾
更多信息和用法请查看命令帮助或项目主页:https://github.com/System233/ll-killer-go
理论上可以写个脚本一键扫描并打包整个仓库,就是心疼硬盘。
此外还有个bug限制了玲珑的多线程构建:~/.cache/linglong-builder会被不定期重命名为 ~/.cache/linglong-builder.old-xxxxx,导致构建流程全部失败,并且无法自行恢复。
发表回复