Build Your First Linyaps Application
This developer introduction uses deepin-calculator to complete configuration, building, debugging, runtime validation, and distribution. If you have not installed or run a Linyaps application yet, complete the Quick Start first.
Confirm that the command is available:
ll-builder --versionIf it is not found, use the installer's full mode to install Linyaps and ll-builder together:
curl -fsSL https://raw.githubusercontent.com/OpenAtom-Linyaps/linyaps/master/install.sh | sh -s -- fullIf the installer does not support your distribution, follow the manual steps in Install Linyaps to install ll-builder.
Configure the Project
A Linyaps application ID uses reverse-domain notation and contains at least one .. Sections before the last may contain only numbers, letters, and _; the final section may also contain -. Create a project with the ID org.deepin.calculator:
ll-builder create org.deepin.calculatorThis creates a project directory containing a linglong.yaml template:
org.deepin.calculator/
└── linglong.yaml
Enter the directory:
cd org.deepin.calculatorOpen the generated linglong.yaml. The template has already filled package.id from the application ID, while other fields are placeholders. Replace them step by step and save the file after each step.
Step 1: Enter Application Metadata
Change package to:
package:
  id: org.deepin.calculator
  name: deepin-calculator
  version: 5.7.21.0
  kind: app
  description: |
calculator for deepin os.idis the unique identifier used by repositories and for installation and execution.ll-builder creategenerated it from the project name; do not change it casually.nameanddescriptiontell users the application name and purpose.versionparticipates in version comparison to determine whether an update is available.kind: appmeans that this is a launchable application rather than a Base, Runtime, or Extension.
Step 2: Select a Base and Runtime
Change base and add runtime:
base: org.deepin.base/23.1.0
runtime: org.deepin.runtime.dtk/23.1.0
The Base provides fundamental system components such as glibc, while the Runtime provides framework libraries shared among applications. This version of deepin-calculator depends on Qt5 and DTK5, so it uses the compatible pair org.deepin.base/23.1.0 and org.deepin.runtime.dtk/23.1.0.
New applications should generally select the latest maintained Base and Runtime. Consult Runtime Components when needed.
Step 3: Declare Application Sources
Uncomment the sources example and first declare the Calculator source:
sources:
  - kind: git
    url: https://github.com/linuxdeepin/deepin-calculator.git
    version: master
    commit: d7e207b4a71bbd97f7d818de5044228c1a6e2c92
sources tells ll-builder what to obtain before the build. Pinning a complete commit keeps an upstream branch change from producing different results from the same configuration at different times. This source is downloaded to /project/linglong/sources/deepin-calculator.git.
deepin-calculator also needs D-Bus interface code from dde-qt-dbus-factory. Because that library is not provided by the Base or Runtime, build and distribute it with the application. Add a second item:
sources:
  - kind: git
    url: https://github.com/linuxdeepin/deepin-calculator.git
    version: master
    commit: d7e207b4a71bbd97f7d818de5044228c1a6e2c92
  - kind: git
    url: https://github.com/linuxdeepin/dde-qt-dbus-factory.git
    version: master
    commit: d952e1913172c5507af080f644a654f9ba5fed95
The second source is downloaded to /project/linglong/sources/dde-qt-dbus-factory.git.
Step 4: Write the Build Script
Replace the placeholder build, which only prints hello, with:
build: |
  # build dde-qt-dbus-factory
  cd /project/linglong/sources/dde-qt-dbus-factory.git
  qmake -makefile \
        PREFIX=${PREFIX} \
        LIB_INSTALL_DIR=${PREFIX}/lib/${TRIPLET} \
        INSTALL_ROOT=${PREFIX}

  make
  make install

  # build calculator
  cd /project/linglong/sources/deepin-calculator.git
  cmake -Bbuild \
        -DCMAKE_INSTALL_PREFIX=${PREFIX} \
        -DCMAKE_INSTALL_LIBDIR=${PREFIX}/lib/${TRIPLET} \
        -DCMAKE_BUILD_TYPE=Release \
        -DCMAKE_SAFETYTEST_ARG="CMAKE_SAFETYTEST_ARG_OFF" \
        -DAPP_VERSION=5.7.21 \
        -DVERSION=5.7.21

  cmake --build build
  cmake --build build --target install
This builds and installs dde-qt-dbus-factory with qmake, then builds Calculator with CMake. ${PREFIX} is the installation prefix for this Linyaps application, and ${TRIPLET} identifies the target architecture's library directory. Every final artifact must be installed into ${PREFIX}, not directly into /usr in the build container. The current implementation places ${PREFIX} at /opt/apps/<appid>/files.
Step 5: Set the Launch Command
Replace the demonstration command with the actual Calculator entry point:
command:
  - /opt/apps/org.deepin.calculator/files/bin/deepin-calculator
command determines what ll-builder run or ll-cli run org.deepin.calculator starts. Set it from the actual installation result so it points to the executable generated under ${PREFIX}/bin.
Step 6: Review the Complete Configuration
The resulting linglong.yaml is:
version: "1"

package:
  id: org.deepin.calculator
  name: deepin-calculator
  version: 5.7.21.0
  kind: app
  description: |
    calculator for deepin os.

command:
  - /opt/apps/org.deepin.calculator/files/bin/deepin-calculator

base: org.deepin.base/23.1.0
runtime: org.deepin.runtime.dtk/23.1.0

sources:
  - kind: git
    url: https://github.com/linuxdeepin/deepin-calculator.git
    version: master
    commit: d7e207b4a71bbd97f7d818de5044228c1a6e2c92

  - kind: git
    url: https://github.com/linuxdeepin/dde-qt-dbus-factory.git
    version: master
    commit: d952e1913172c5507af080f644a654f9ba5fed95

build: |
  # build dde-qt-dbus-factory
  cd /project/linglong/sources/dde-qt-dbus-factory.git
  qmake -makefile \
        PREFIX=${PREFIX} \
        LIB_INSTALL_DIR=${PREFIX}/lib/${TRIPLET} \
        INSTALL_ROOT=${PREFIX}

  make
  make install

  # build calculator
  cd /project/linglong/sources/deepin-calculator.git
  cmake -Bbuild \
        -DCMAKE_INSTALL_PREFIX=${PREFIX} \
        -DCMAKE_INSTALL_LIBDIR=${PREFIX}/lib/${TRIPLET} \
        -DCMAKE_BUILD_TYPE=Release \
        -DCMAKE_SAFETYTEST_ARG="CMAKE_SAFETYTEST_ARG_OFF" \
        -DAPP_VERSION=5.7.21 \
        -DVERSION=5.7.21

  cmake --build build
  cmake --build build --target install
See Introduction to the Build Configuration File for all fields.
Build
ll-builder buildWait for the build to finish. If it fails, correct the configuration and try again.
A successful build is committed automatically to the local build repository. Use ll-builder list to inspect built applications and ll-builder remove to remove a committed project. A committed build can be run for validation or exported for distribution.
Run the Linyaps Application
Validate the application:
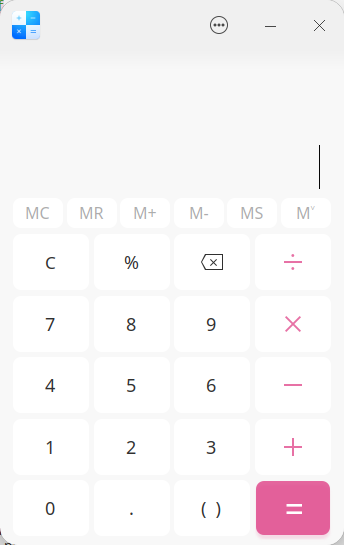
ll-builder runCalculator should appear:
To debug it, enter its runtime container in debug mode:
ll-builder run --debug -- bashSee Debug a Linyaps Application for GDB, gdbserver, Visual Studio Code, and Qt Creator configuration.
Export and Distribute
After local validation, export a UAB:
ll-builder export --ref main:org.deepin.calculator/5.7.21.0/<arch><arch> is the artifact's target architecture, such as x86_64, arm64, or loong64. Use ll-builder list and replace the sample ref with the complete displayed value.
Validate the application in a real user environment on another machine with Linyaps installed:
ll-cli install ./org.deepin.calculator_5.7.21.0_<arch>_main.uab
ll-cli run org.deepin.calculator
Replace <arch> in the UAB file name, or use the file name produced by the export command.
To publish to a remote repository, configure the repository and credentials, then run ll-builder push. See ll-builder push and Repository Management.
Continue Reading
- ll-builder Workflow explains how
ll-builderworks. - Understanding the Build Configuration uses the real Linyaps configuration to explain Meson, Autotools, and CMake builds.
- Convert from deb demonstrates a conversion using Antigravity.
- linglongdev maintains real application configurations.